So with the new upcoming version of Veeam Agent for Windows, you will be able to backup directly to a Backup & Replication server. Not everybody knows this but you will also be able to backup to Veeam Backup & Replication Free Edition provided you have a license for the Veeam Agent for Windows. This might be important for smaller shops who have only a couple of machines and do not have a Veeam Backup & Replication license.
The steps to enable this are not so difficult but without the GA product, there is no documentation so it might be difficult to figure out how it all ties together. So here are the 7 steps you need to take to get it all working. Special thanks to Clint Wyckoff who shared these instructions internally.


The steps to enable this are not so difficult but without the GA product, there is no documentation so it might be difficult to figure out how it all ties together. So here are the 7 steps you need to take to get it all working. Special thanks to Clint Wyckoff who shared these instructions internally.
Step 1: Start by installing Veeam Backup & Replication
Fairly simple start. Download Veeam Backup & Replication Free Edition. Then mount the ISO to your target server, click the install button to start the installation. Basically, in this example, we did a next next next finish install. If you are doing this in production, it might actually be good to read what you are doing. Notice in the license step, I did not assign any license so the free mode will be installed.


Step 2: Enable full functionality view
The next step is where one of my partners got stuck. You need to enable "Full Functionality" view to get through the next steps. By default, you get "Free Functionality" view which shows you only the options you can use with the Free mode. However, if you add a Veeam Agent Windows license, you will unlock more functionality than is available by default in the free mode for your agent backups
To enable it, go to the main menu, select view and then finally select the "Full Functionality" mode

Step 3: Add the Veeam Agent for Windows license to Backup & Replication
This might also be confusing, but you do not need to add the license during the Veeam Agent for Windows install. Rather, you add it to Veeam Backup & Replication and then, when you connect a Veeam Agent for Windows to VBR, it will acquire the license from the VBR server. This is good because you get a central place to manage the license.
Go to the main menu but this time choose "License". In the popup, click the install license button and select the Veeam agent for Windows license file (lic file) in the file browser. The result should be that the license is installed but the VBR server itself remains in Free mode


Step 4: Define permissions
Next step is to define the permissions on your repository. Got to "Backup Infrastructure" section and click the "Backup repositories" node. Then select the repository you want to assign rights to. Finally click "Agent Permissions". Then in the popup window, you will be able to assign permissions
For this tutorial, I made a separate user called "user1", just to show you that you can do very granular permissions


Step 5: Install the client
Installing the agent on another machine should be fairly trivial. However, in this setup, we choose not to configure the backup during install nor to create a recovery medium. However I would highly recommend you to do create a recovery medium so that you can execute bare metal recoveries if needed.


Step 6: Configure the client
Once the product is installed, we can configure it. To open the control panel, go to your system tray. A new icon should have appeared which has a green V. Because we did not configure anything yet, it should also have a small blue question mark on it. Right click it and select control panel.
When the control panel appears, ignore the fact that it does not have a license (click no). Click configure backup to start the configuration.
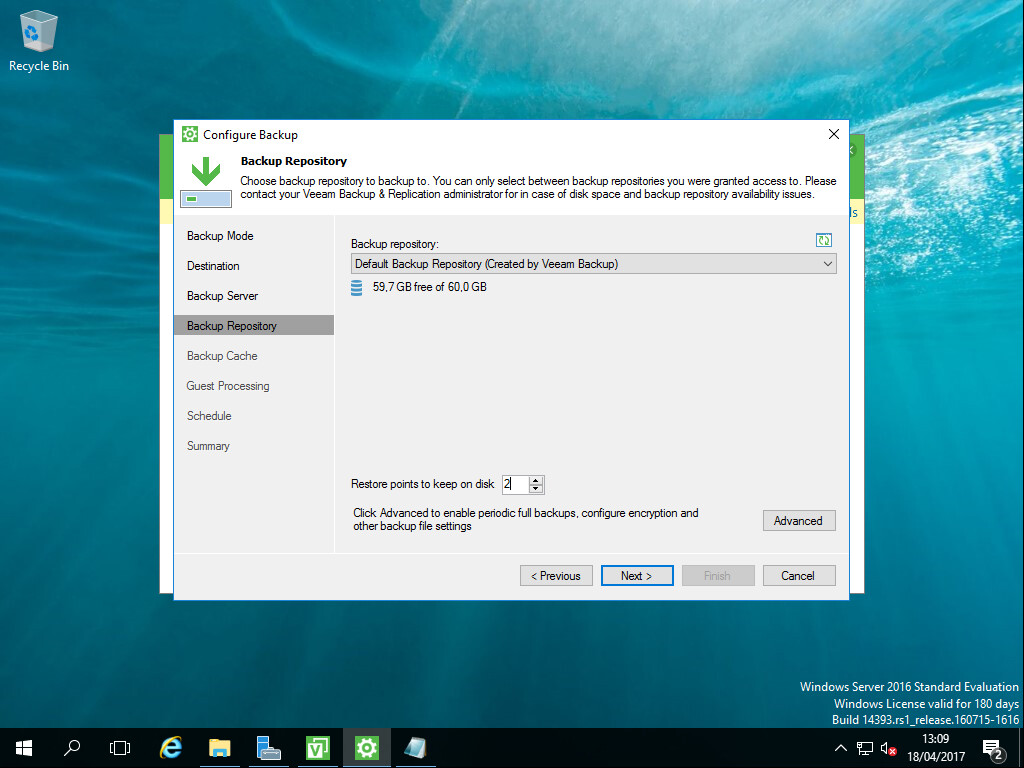
Finally in the backup wizard, as a target select Veeam Backup & Replication Repository. Specify the FQDN/IP and the credentials. When you click next, the permissions are checked and the license is acquired from the backup server. In the next step, you are able to select the repository.


Btw, if a user connects without permissions on the repository, the configuration wizard will refuse to go the next step

Step 7: Run the backup
With the configuration done, you are ready to run the backup. You can see the backup job and backup from the Veeam Backup & Replication repository.
In the Veeam Agent for Windows, if you click the license tab, you will also see that the agent is licensed through Veeam Backup & Replication


So what's next?
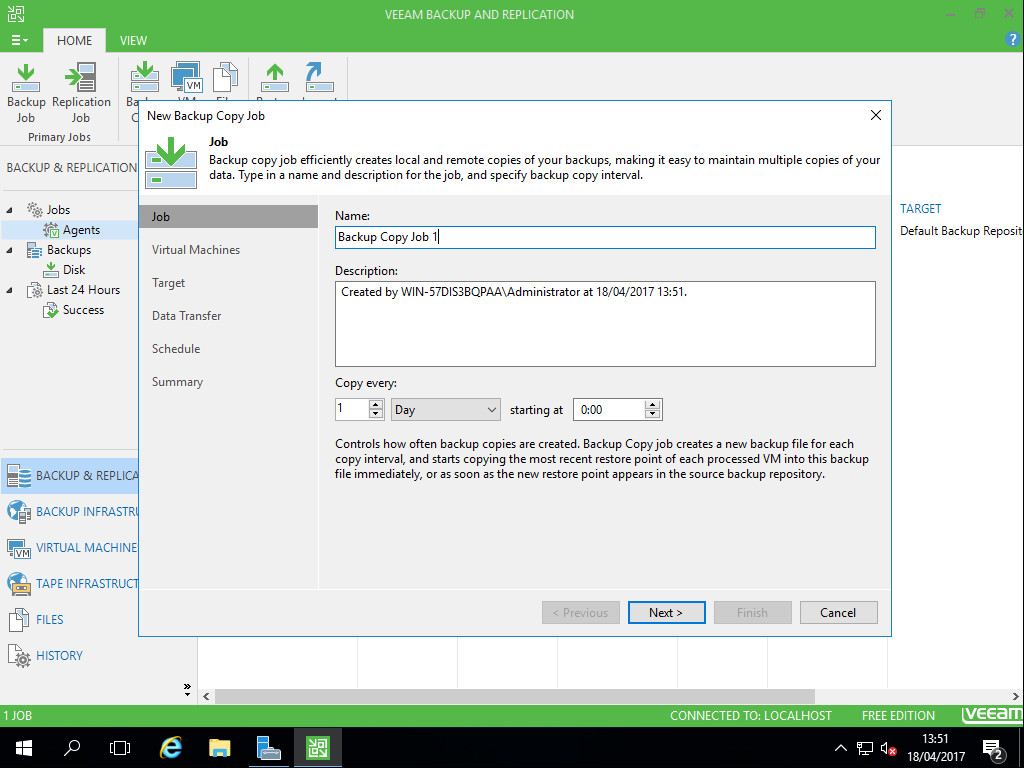
Well, you can explore what other functionality is enabled when you backup to a free edition. One cool feature would be to "backup copy" your job to a second location. For example, in the following screenshot, I defined a repository on another drive, and then did a backup copy job to the second location.