2020/04/10

NAS Multiplex

If you ever tried to add multiple shares from a root share in the new Veeam B&R v10, you might have noticed that you have to map them one by one. During beta, I already experimented with some sample code how to add those shares in bulk. So for the GA, I decided to build a GUI around it.

First of all you can find the script on https://github.com/veeamhub/powershell/tree/master/BR-NASMultiplex .

So after that, it is just a matter of running the script by clicking it and say "run with powershell". You might need to change your execution policy if you downloaded it. Also make sure to run this on the backup server as it load the VeeamPSSnapin in the background

So let's look at an example. In my lab, there is a server with 4 shares, share1, share2, share 3 and share 4. Before running the script, 2 are mapped and added to 1 job


Now when you start NASMultiplex, you can select that job, and select one of the shares as a template or a sample for the newly created shares. Basically the new shares will be added with all the settings of the sample share.


"Base" is basically a prefix field. In the big field below, you can see that per line,  a share can be added (e.g share3 and share4). The concats base+share to form the full path. It does just concatenate the strings so you could either choose to have base ending in "\" or if you don't you must add the separator in front of every share.

Finally there is "Altpath". If you're sample share has storage snapshots enabled, it show you the pattern it use to fill in the storage alternate path for the new share. {0} will be replace with base and {1} will be replaced with the share name. So for this example, share 3 would become \\172.18.87.231\share3\.snapshot . If altpath is disabled, than it should mean that your sample share uses VSS snapshots or just direct copy

When you are ready to go, click add shares and the script will run in the background until a popup appears


Add that point, the shares should be added to the system and to the job


Final notes: This has only been tested with SMB so with NFS it might not work, but it should be pretty easy to get it fixed if it doesn't. It was also built in one evening so would be great to hear your feedback, what does work and what definitely doesn't work

2019/06/12

Compiling martini-cli from source

Just a small post for those wanting to compile martini-cli from source (for example if you want to run the cli from Mac or windows)

First you need to install go(lang) compiler. Depends a bit on the OS but should be straight forward in most case : https://golang.org/dl/ . For Ubuntu, you can just find the package golang in the repository so you can just install it via the packet manager

sudo apt-get install golang


Then once the go  compiler is installed, you can just download the code and compile it with the go command
go get -d github.com/tdewin/martini-cli
go install github.com/tdewin/martini-cli


And that's it! You should now have a binary in go/bin called martini-cli. You can find and edit the src in go/src. Recompiling with the go install.. command. Happy hacking!

Installing Project Martini

At VeeamON my colleague Niels and I presented Project Martini. A kind of Manager of Manager for Veeam Backup for Office 365. Today I'm writing a small post for those who want to go ahead and install the solution

The first thing you need is a Linux server. Could be virtual, could be physical. We strongly recommend an Ubuntu version as this is what we used in AWS and the screenshots of this blog post are from an on premise Ubuntu installation (18.04 LTS).

Once you have installed Ubuntu, you can download the martini-cli. I'll make another small blog post on how to compile it from source but for this post, you can just download the binary. So let's make sure we have the right tools to unzip and get the binary first

sudo apt-get update
sudo apt-get install unzip wget


Now you can go ahead and install the binary

wget https://dewin.me/martini/martini-cli.zip
sudo unzip martini-cli.zip -d /usr/bin
sudo chmod +x /usr/bin/martini-cli


Once you have the binary in place, you are ready to start the installation. If you are running Ubuntu, the setup should detect this and propose you to install the prerequirements

sudo martini-cli setup


On the question if you want to install prereq, answer "y". It should download all the prerequirements. Then it will prompt you to install terraform and martini-pfwd. Please answer "y" to continue. Once this is finished, it will prompt you to create the mysql database. It is automatically installed but you might want to secure it a little bit more.


So start the mysql prompt and create the database. The cli gives you a very simple example to go ahead and create the database. Please make sure you remember the password.

mysql -u root -p


Finally rerun the setup wizard but this time, don't install the prereqs (as this already is done). This will download the latest martini-www release from github and will ask you for the database connection parameters

sudo martini-cli setup


Once you went through the whole process, martini is installed. Make sure to remember the admin password you gave in during the installation. You need it to authenticate the cli or the webgui. You also might need to chown the config file if you run the process with sudo. In my case, my user is timothy but that might be different on your system. Once everything is done, you can test the connection with martini-cli

sudo chown timothy:timothy .martiniconfig
martini-cli --server http://localhost/api connect 


You can now run the cli. For example martini-cli tenant list. Since there is no tenant yet, you should should see a lot of # signs.

If you browse to the IP of the server, you should now also be able to login with admin and the password. In my screenshots, I used port 999 to map to an internal server so you can just ignore that and use the regular port 80 if you have direct access to your machine


2019/01/30

Get your offline RPS version

Some people have asked me in the past, is there a way to get RPS offline or to export it's result. In previous versions I tried to add the canvas rendering (basically generating a PNG) or generate an URL that you can share with your colleagues. However, for a lot of people this does not seem to be enough. Enter RPS-offline...

RPS-offline can be download here. The source code itself is on github. If you have a Mac or Linux, you should be able to compile it with GO(lang). Once you have download it, my recommendation would be to extract the tool in c:\rps-offline. This is not a strict requirement, but you will see why later


The first time you run the exe (or the bat file), it will download a zip (latest version from github) and start a local server, redirecting your browser to it


The next time the binary runs, it will detect the zip and it should not require any network connection.

But of course that's not all. When you have done a simulation, you can hit the c key (csv). It will export the data to a csv file. You can also push the j key (JSON), which will export the data a JSON file. Why JSON? Well it allows to export more data fields in a predictable way and a lot of scripting language can easily import it. That's why, you can also run a postscript after the JSON is generated


And this is where the .bat files comes in to play. It will tell rps-offline to run a script called Word.ps1. I'm not really planning on extending this script. The Word.ps1 is merely a sample script that you delete, change, modify, etc. It does show you one of the possible things you could do e.g generate a word document with Powershell. Of course, this will not work on Linux or Mac, but you are free to run whatever command you want. That's the beauty of not embedding all the code inside rps-offline itself. You will also see that the .bat and .ps1 script refer to the fixed path c:\rps-offline so if you want to store it on another path, make sure to edit the .bat and .ps1 file


When you are done, push q (quit) to stop the program and the local web-service.

This is of course a first version, but I'm curious if people find it useful or to see if people make other conversion scripts. I could imagine a scenario where you take the JSON output and import it in a DB as well. So please let me know what are you thoughts on twitter @tdewin ! Hope you guys enjoy!

2018/09/25

Show me your moves, VBO365

Maybe one of the biggest new hidden gems in VBO365 V2.0 is in the Powershell cmdlets. You can now move data from one repository to another. Why is that important? Well retention is defined on a per-repository level. Imagine Alex. Alex is just a regular employee but recently got promoted to upper management. In terms of backups, that means Alex his emails become super important! So instead of 2 years, we now need to keep Alex his emails forever.

In previous versions, you could have just excluded Alex from one job and included Alex in the appropriate job. However, that would mean that you would have to download all the data again. In v2, there is a simple commando to do this called Move-VBOEntityData.

Before we can use this command, we first need to prepare some variables. First we need to get the source repository and the target repository. In my case repo2y and repoinf. Then we get Alex with Get-VBOEntityData.


Now we can actually move Alex to a new job. Make sure the source and target job are not running before you moved the data.


Alex is in the job


And now Alex is gone!


A brand new VIP job for Alex


Pointing to the new repository


Don't run the new job!


Let's now execute the move passing the source, target repository and Alex


If you now start the job, you will notice that it processes the items but it doesn't have to write anything to disk because the data is already there. Basically, it checks if all the data is there but doesn't download it again


And we can actually see that nothing is being download in the logs itself (default is "C:\ProgramData\Veeam\Backup365\Logs")


For those looking to remove data instead of moving it, notice there is also a Remove-VBOEntityData now. For those wanting the complete code (although pretty trivial), you can check out this gist on github


2018/02/23

vCoffee: Looking at the VAC REST API Integration

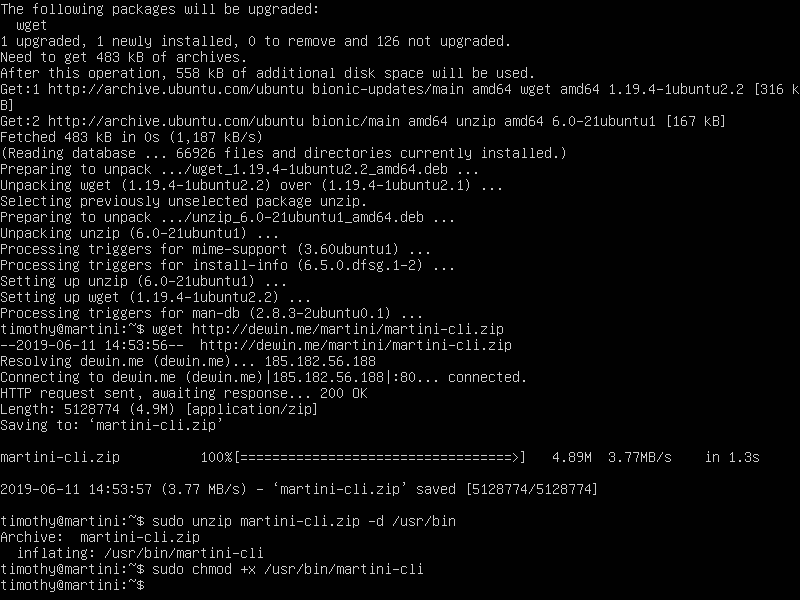
In the blog post, we will take a look at the VAC REST API integration. First of all, all the code specifically for VAC can be found on VeeamHub in app/backend/restIntegration-vac.js. You will see that this file is only 100 lines big, but still packs all the functionality to talk to the REST API. For this blog post, I'm using slightly altered code which can be found here


Step 1 : Understanding fetch (JavaScript Specific)

If you want, you can play with this code by installing NodeJS (in this demo v6.11). The demo is  dependent on one framework called fetch that is automatically included in NativeScript (the framework used to build the app), but is not installed by default in NodeJS. So the first thing we need to do is install fetch and check if it works. Installing fetch can be done with "npm install node-fetch" once you have installed NodeJS


Once you install node-fetch, you can start node and execute the JS code to test the module. I have to say that the first time I saw the Fetch code, it was quite confusing for me. Fetch uses a "pretty new" JavaScript feature called a Promise. Promises are you used when you want to execute some code asynchronously, and when it's done, it will run or the resolve code (everything went OK) or the reject code. This is pretty weird, but it means that Fetch doesn't block the main thread. This also means that if you try to fetch an URL that doesn't exists, at first it looks like nothing is happening, but only after the timeout has happened, your reject code will be ran. So be patient, and wait for the error if it looks like nothing happened

In the app, the GUI basically passes a success function (for example, moving to the next screen) and a fail function (alerting the user that something went wrong). For this example, we will just print some messages to the console.

What is also pretty weird, is the statement ".then(function(res) { return res.text() })". Basically this part creates a new Promise, that will succeed if we can parse the body content, and if yes, run the next then clause. This seems pretty trivial when you are parsing text, but for example, if you try to parse JSON, errors might occur while parsing. So this chains the promises. First you get the "Promise" that the webpage was downloaded or the fail code is ran. Then you get that the "Promise" that the body is parsed or otherwise the fail code while be ran.


In the app I use the short hand arrow functions which are also quite "new" in JS. Basically it allows you to create anonymous function but in a more compact way. Compare "function(res) { return res.text() }" which roughly compares to "res => res.text()"

If this sounds like Chinese to you, that's fine, then focus mostly on what is between the fetch function, and the second then. The result is quite clear, we get "http://dewin.me/vcoffee/jobs.json" and then print out the body to the console.

Now the nice thing about Fetch is that if we just alter the first then, and change text() to json(), fetch will parse the JSON body to a JavaScript object. So now the second then, does not receive plain text, but real objects if parsing was successful.


Step 2 : Logging into VAC, the real deal

OK, so let's look at the VAC Rest API. To login, the GUI passes an object with the URL, Username and Password. The goal is to login and get a token. When we get a token, we can are basically logged in, and next time we want to fire a request, we can just use the token, instead of sending a username and password. The theory is defined in the VAC REST API documentation, but let's put this into practice


The maincontext object is something that is created in the GUI and then passed to the backend. Here we are just creating it on the command line. In this code, there is a first fetch to "/v2/jobs", you can ignore this one. Basically it is some probe code to see that the server is really a VAC server before trying to authenticate. More importantly is the second fetch.

Here we do a fetch of apiurl+"/token". But instead of  just doing a plain download of the webpage, we are altering the request a bit. First of all, we need to use the "POST" method. Secondly, we add some headers to the request. Content-type should be set to "application/json" and we add the "Authorization" set to "Bearer" as specified by the API documentation

Finally in the body of the request, we tell the API that we want to authenticate with a password (grand_type), and supply the username and password. This is supplied as an URL encoded format, and honestly, the way the code is written in this example is not that clean. It would have been safer to use something that takes a JavaScript Object and parse it to an URL encoded format.

If all went well, you should get some JSON. Again we can parse the text and then we can extract the access_token. The code prints out the access code to the console and set's it to maincontext.sessionid for later reuse.

I don't want to go too much into detail but your access_token expires every hour. In the same reply, there is also a refresh_token you can reuse, to get a new access_token before it expires. I'm not going to cover this, but if you want your application to stay logged in, you would need to have some timed code that runs every, let's say, 45 mins, and that renews your token. In this case, your grant_type is not password but refresh but this also covered in the documentation. Finally, once you are done, you should also log out. Again, we will not cover this in this blog post.

Step 3 : Getting the jobs

Now that we are logged in, we can actually do some work. Every time we need to do a request, we should specify that we are using JSON, and also that we are authenticating via the Bearer access token. Since we need to do this for every request, let's make a functions, that just make the headers object based on the access_token, so we can reuse it over and over again. Basically we need to set the "Authorization" header to "Bearer "+access_token. What is really important is that if you are building this code in another language, there is a space between the word "Bearer" and the access_token.


Then, let's get a list of the jobs. Following the documentation, we should be able to get this by executing a "GET" to /v2/Jobs (watch out for caps). However, since other types like "Tenants" or "BackupServers" are requested in exactly the same way, just a different URI ending, we will just make a generic "getList" function, and then just a small wrapper function that use the "getList" function. 

Here is where the VAC API in combination with JavaScript really shines in my humble opinion.  We get the page, using the authentication header, we parse the JSON text to objects and the we run success. In success, we get an array of jobs which are passed. We can select the first element by using jobs[0], and use it properties to print the name and the id. For me this code is quite compact and extremely easy to read.


Step 4 : Starting a job

The last step is to start the job. Be careful, this code will actually start the job! Following the API documentation, we need to a "POST" to /v2/Jobs//action . For example, in the previous screenshot, we can see that "Replication Job 1" has an id of 16, so if we want to start it, we need to a POST to /v2/Jobs/16/action.

Now we also have to specify the request body (which is also JSON). To start the job, the documentation states we need to send '{"start":"null"}'. Again, this scenario, can be made generic for other actions like start, stop, disable, etc. by just replacing the word start. So let's build another more generic function called actionJob. We will use the jobaction parameter to modify the JSON text we are sending. Again, this is not the most clean example.

You should actually take a JS object, and stringify it to JSON. And in fact, I should update the code to something like "JSON.stringify({[action]:null})", but this is just to keep the example as simple as possible


In the success function, we can now use the console.dir function to dump the content of the reply object. If the job started succesfully, you will get a reply like "Action Started"


Finally: where to go from here

Well, first of all, the API documentation is really good. I'm pretty sure that by modifying this sample code, you can get a long way. I hope it also shows that there is no really rocket science involved, especially if you want to use the API to dump the status data to another system for example. I could imagine that you can use this sample code, to get the data out of VAC, and automatically create tickets for failed jobs in your Helpdesk system.

2018/02/15

vCoffee : Drink coffee and check your backup jobs from your smartphone

For some months now I had the idea to make an App for Veeam Availibility Console (VAC) and / or Veeam Backup & Replication (VBR). While getting a coffee in the morning I noticed, people spend quite a lot of time queuing or waiting for the machine to deliver the coffee.


That's why I'm glad to introduce vCoffee today. It is a small app, currently available in alpha which you need install manually on your Android device. The app itself is rather simple: You login, get an overview of all jobs and you can see the latest state. If required, you can click the job, and start the job directly from the app. As a bonus, you also get an "RPO" indicator, which tells you if the jobs started in the last 24h. So if the job was successfully but didn't run for the last 5 days, this will also be indicated in the first screen.

What I'm also really excited about is that it covers both VAC REST API and VBR REST API. This means that as a partner, you can check all your customers or tenants from the app. As a customer, you are able to monitor your VBR server via the Enterprise Manager. Do note that REST API is part of the Enterprise Plus licensing.

One thing that is really important is that Android seems to be quite paranoid about security and this means that you can not use self signed certificates. For VAC, I don't think this is a big issue but maybe for enterprise manager, you might have used self signed certificate. That's why I also would like to refer to my colleague Luca Dell'oca. He wrote an excellent article about "Let's encrypt". I used the article for both VAC and Enterprise Manager. For enterprise manager, if you have already installed it, there is an excellent article that explains how to replace the certificate.

Here is a small demo of the app. I can tell you that on my native phone it works a lot faster but due to the Android emulation, it looks quite slow in the demo.

The code is released under MIT License on VeeamHub, the Veeam community which get contributions from Veeam employees but also external consultants an Veeam enthusiasts.  This means that everybody can contribute and reuse the code as he or she likes. It also means that no responsibility will be taken and you can not contact Veeam Support for help. Basically, this app was not developed by Veeam R&D and has not been checked by Veeam QA.

In a follow up article, I'm planning to discus the VAC REST API, because I was amazed how simple this really was. This because the app itself is JavaScript code and the JSON support of the VAC REST API makes parsing the objects extremely simple

Finally, you can download a debug build here as long as I'm not running out of bandwidth usage.